
And so the Toilet Closet odyssey comes to a close.

If you'll recall, way back in October, when the air was just starting to get crisp and I was highly motivated to start a house project, I wrote about our shameful little "bathroom" under the stairs.
If you'll recall, way back in October, when the air was just starting to get crisp and I was highly motivated to start a house project, I wrote about our shameful little "bathroom" under the stairs.
The ceiling was crumbling, the walls were cracked,

the floor was perpetually dirty looking,

and perhaps the worst offense - you couldn't even close the door behind you.
Sheesh.
I remember in one of my early planning posts I said that I believed wholeheartedly that we could get two extra feet out of this bathroom and the other day, out of curiosity, I grabbed a tape measure and what do you know, 24 inches exactly.
So, if anybody wants me to pick out their lotto numbers tonight, I'm available.
So, if anybody wants me to pick out their lotto numbers tonight, I'm available.
Alright then, let's take a look at where we ended up and a few glances back at the process.
First up, a head-on view of where the toilet used to sit.

Like I mentioned up yonder, the thing looked R-O-U-G-H, rough. But, for all its shortcomings, it was handy and we did use it.
Now, here is the same view of where the toilet used to sit and the sink does now.

The dimension of the room in that direction didn't change. It's still the same depth there as it was before.


The vintage sink that we found at the Barn at the Farm is the perfect size for the space. I will admit that the handles are so small, it's kind of hard for people with normal, human-sized hands to turn them completely off. I usually have to use both hands to turn the cold water off after I wash my hands.

When I posted a million years ago, I revealed a little glimpse of the Rust-o-leum High Gloss, Enamel, Black paint we decided to go with.

I'll admit, when we did the window I was worried. It stood out like a sore thumb in a sea of white Sheetrock and I would be lying if I said I didn't have a lot of second thoughts.

But, after the walls were painted and the floor went in, it looked slick as a whistle.
But, after the walls were painted and the floor went in, it looked slick as a whistle.
When we started, I had every intention of re-using our leftover tiles and grout from the upstairs bathroom but if I'm being honest, I really wished that we had done a matte finish tile upstairs and so I decided to right that down here.

We also decided on a lighter grout and I'm glad we did. It made for much less mess and it was easier to buff it off of the tile after it had set up.
We also decided on a lighter grout and I'm glad we did. It made for much less mess and it was easier to buff it off of the tile after it had set up.

Now, if you've read carefully, you'll remember that I sort of casually mentioned that I used to get ready in that little toilet closet while we were remodeling the upstairs bathroom a couple of years ago. And I may have mentioned that I kept getting ready down there even after the upstairs bathroom was done because I couldn't get close enough to the mirror to do my makeup. Well, when we re-did the powder room I knew that I would be doing my makeup down there so it needed to have storage. I know it seems strange to go downstairs to get ready in the morning but if you have a spouse that gets ready at the same time as you every day, you'll totally understand how much easier it is to have a one-to-one bathroom to person ratio ; )
So, the little over-the-toilet nook was born.

It's tucked right in under the stairs and it's actually a surprising amount of storage!

I had originally thought I would put toilet paper here but as luck would have it, I found this gigantic basket at Tuesday Morning and it holds like, 12 rolls!!
It's tucked right in under the stairs and it's actually a surprising amount of storage!
I had originally thought I would put toilet paper here but as luck would have it, I found this gigantic basket at Tuesday Morning and it holds like, 12 rolls!!

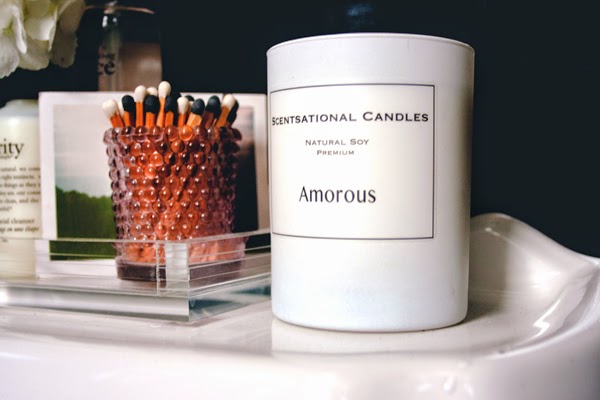
So, I got a little, deep-discount, damaged jewelry box from Tar-jay for my makeup and a couple of nice towels and candles to fill in the space.
I may do my makeup down here but I didn't see the point in putting my face-wash and nail polish and all of that stuff down here since I do all my exfoliatin' and nail paintin' (lol, I never paint my nails) at night, in the upstairs bathroom.
I may do my makeup down here but I didn't see the point in putting my face-wash and nail polish and all of that stuff down here since I do all my exfoliatin' and nail paintin' (lol, I never paint my nails) at night, in the upstairs bathroom.

The light fixture is just a cheap, porcelain one from ACE with a silver-tipped bulb that we had gotten a long time ago when we did the same thing to the upstairs bedroom lights.
So, that's pretty much it! Like I said, I was a little uncertain at times about the color but now that it's all put together, I absolutely love it.
I've totaled everything up and it looks like we came in just a little over $700 for the entire project - frames and towels and everything. Not bad, I'm gonna' say. Not bad at all.
I've totaled everything up and it looks like we came in just a little over $700 for the entire project - frames and towels and everything. Not bad, I'm gonna' say. Not bad at all.
Here's where (mostly) everything in the little powder room came from if you're interested:
Wall paint: Rust-o-leum gloss black enamel
Ceiling paint: Olympic bright white, semi-gloss
Ceiling Light: Porcelain Light Fixture
Ceiling Bulb: 1,000 Bulbs
Sink: The Barn at the Farm
Sink Tray: Vintage, already owned
Mirror: Vintage, Paramount Antique Mall
Frames: Target, Ross, TJ Maxx
Lucite Toilet Tray: Marhsall's
Hand towels: Target
Basket: Tuesday Morning
Floor Tile: Lowe's, American Olean
Grout: Lowe's, White, Unsanded
And if you want to follow the toilet closet odyssey from the beginning, you can do so here!
And if you want to follow the toilet closet odyssey from the beginning, you can do so here!
I've got another post coming up real quick about some exciting Lamphouse developments and some exciting exterior plans/projects we're working on (aka: what we've been putting off since forever).
Until then,
Keep Smiling!
Truly stunning! You are a space planning genius!
ReplyDeleteAw, thanks Alyssa : D
DeleteThat room is amazing! I admit to having seen the black bathroom trend in high end decor magazines and thought it was a great idea but not practical for real houses, but you have proven me wrong.
ReplyDeleteYeah, even I had my moments of doubt and I probably wouldn't have done it with any other room but in the end, I loff it in here!
DeleteThis is even more beautiful than I thought it would be! Lovely :)
ReplyDeleteThank you! And also, nice to (internet) see you again ; )
DeleteThis is great. What a great re-conception of a space!
ReplyDeleteThanks, Kimberly!
DeleteLOVE your powder room and the new blog look like crazy!
ReplyDeleteThank you! Figured it was time for a change : )
DeleteA little jewel box under the stairs! SO pretty!
ReplyDeleteThank you! I keep saying "Is it odd that the most glamorous looking room in the house is hidden down here on your way to the basement?"
DeleteWhat are the dimensions of this space before and after? Thx
ReplyDelete